
If your designs are a bit on the darker side of the color spectrum, you might want to use brighter and more eye catching font styles for your titles. In this tutorial, I will show you how to illuminate your poster or brochure printing designs with Neon text. Let’s get started.
1. Now, with a new document open, make sure to first add a dark background. The bright neon colourful effect won’t be maximized if the background is bright. So go for something dark. It does not necessarily have to be black, it can be a dark grey a deep dark red or something similar. In our example, we have set a background of a gradient, dark red (#410000) to an almost black color (#100000).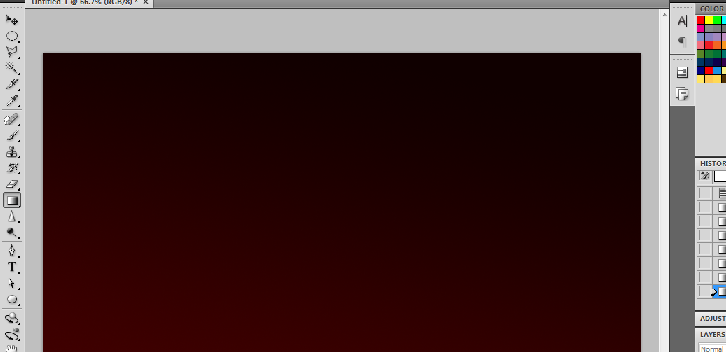
2. Now type in your title text. While of course you can use any font style you like, to pull off a good neon styled effect, it is best to use thinner style fonts. This is because most neon signs of course have thin characters. So if possible try a sans serif font that is thin for your neon titles.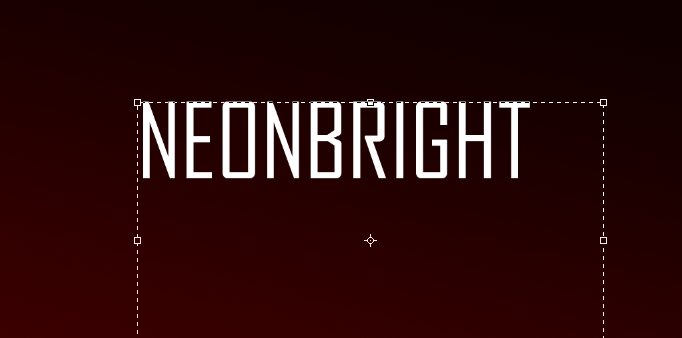
3. Before you continue, first duplicate your text. You can do this easily by right clicking on the original text layer and then choosing “duplicate layer.” Alternatively just press CTRL+J.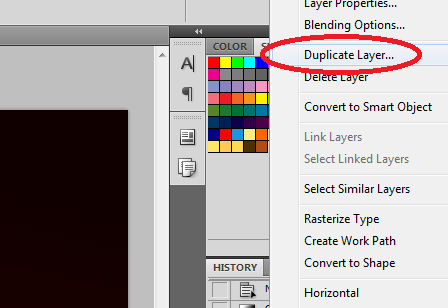
4. Now, hide the duplicate layer for now by clicking on the “Eye” or visibility icon besides its layer name. We will use this later.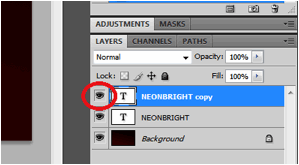
5. Next, double click on the original text layer to bring up its blending options/layer styles. Then, click on the option for “gradient overlay”. To make our neon text look colourful, you will want to use a gradient combination with at most 4-8 different colors (depending on the length of your title). Do this by clicking on the gradient box and then selecting your colors. Also add in the following settings:
a. Blend Mode: Normal
b. Opacity: 60
c. Gradient Color: (Spectrum colors)
d. Style: Linear
e. Angle: 0°
6. That gives us our basic colourful text style.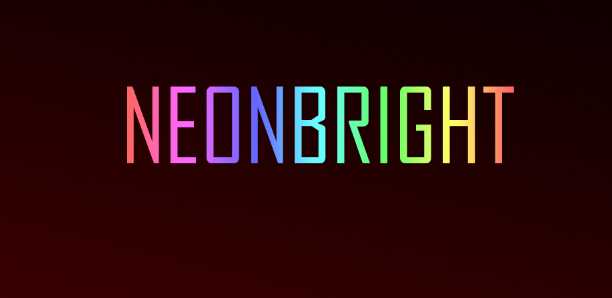
7. Now, we will make things a little bit blurrier to simulate the bright color effect of neon lights. With our layer selected, go to Effects -> Blur -> Gaussian Blur.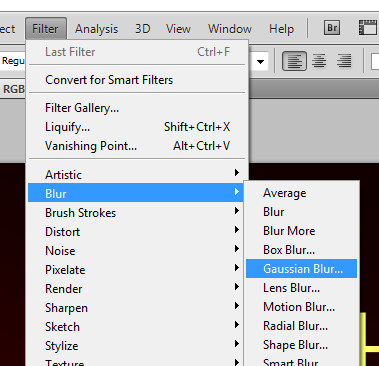
8. A window will appear asking you if you want to “Rasterize” the type. Go ahead and click OK. Once you get to the Gaussian Blur settings add a 4.0 pixel blur radius value. You can of course play with this value if you want but this is a good value to start with for the neon text effect.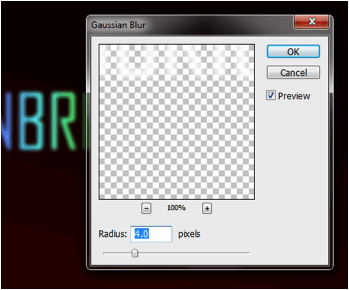
9. Don’t worry if your text turns “too fuzzy”, we will now work with our duplicate layer from before. Make it visible again by clicking on the eye icon. Afterward, apply the Gaussian blur effect again to this layer (Rasterize the type again if asked). This time though, use a 1 pixel blur radius.
10. Now, go to the layer styles and blending options for this duplicate layer. In the main blending options controls. In the Advanced Blending area, slide the Fill Opacity setting to 50%.
11. Then, click on the “Outer Glow” effect. Apply these settings in its options area:
a. Blend Mode: Color Dodge
b. Opacity: 50%
c. Noise: 0%
d. Color: CHANGE THIS TO WHITE. Just click on the box and then adjust the color to white.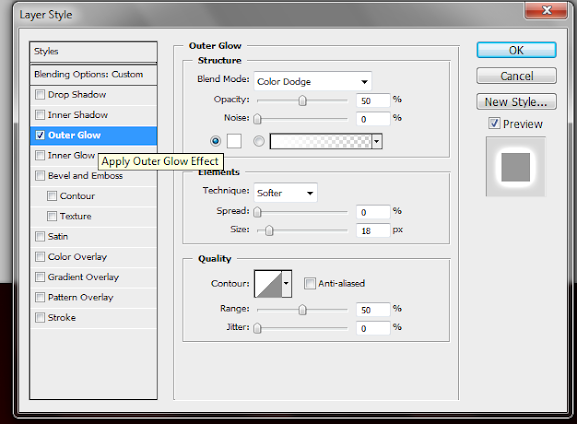
12. Now, if your original text color (that was duplicated here) is White, then you do not have necessarily do this step. Just try to see if you get a better look depending on your font and colors. However, if the original color was not white, then you will want to probably do this. Just click on the color overlay option and change its color to white, Then adjust the opacity to around 50-60%.
13. Now, you should have a nice looking colourful, neon styled title.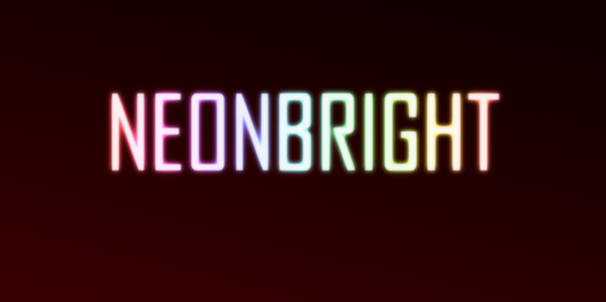
14. Now, you can add your own supporting styles to this by adding reflections, lines and other types of complimentary backgrounds and effects.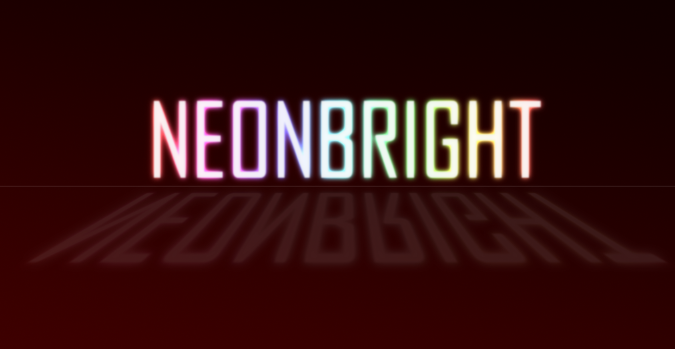
You need to be a member of Maoliworld to add comments!
Comments