
The Clover Leaf, especially the four leaf clover is a symbol of luck. This is a great addition to your digital or print designs, if you are aiming for that lucky, nature like covers. This applies not only for headers and banners, but also for booklet printing, catalogues and brochure printing as well. If you want your own original creation of a clover leaf, then you have come to the right place. We will review here the step by step procedures in creating Clover leaves in illustrator. If you follow these instructions, then you can also create your own vector type clover leaf for your booklet covers or digital print headers.
1. First create a new document. Set your new document profile appropriately if you are using the graphic for web distribution or print distribution. Set your units as pixels or even points if you like that. Once you are done press ok.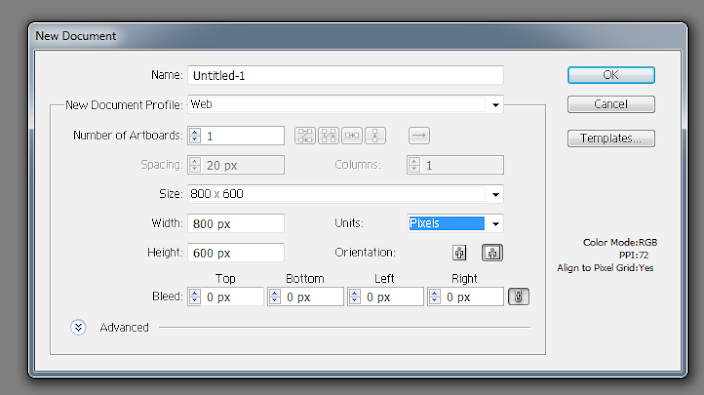
2. Then, before you start drawing, let us start by setting your Fill and stroke values. In the Control Bar, simply select “NONE” as your fill colour, and leave your Stroke to a black colour.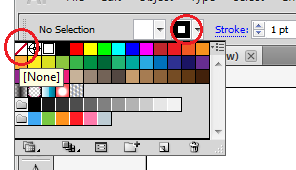
3. Then, select the ellipse tool in your tools window to start drawing some circles.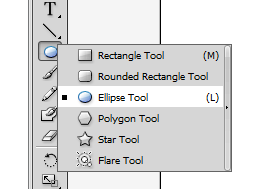
4. Click on a point on your canvass and then select 200px by 200px as your dimensions for your circle.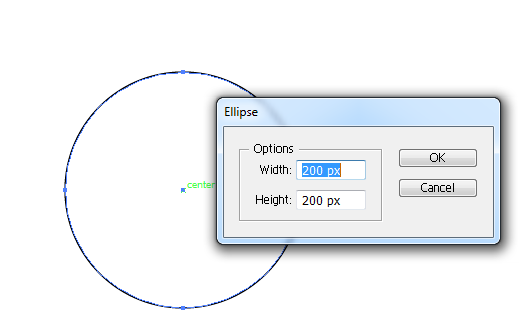
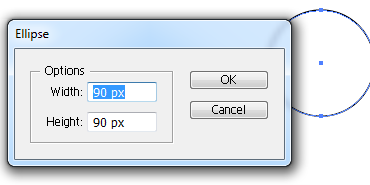
5. Next, create 2 more circles along with this one. Use 125 pixels on the first one, and then 90 pixels on the second one.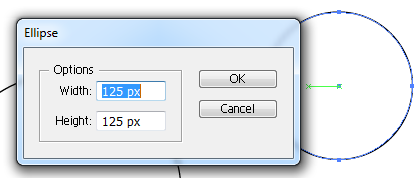
6. Now, combine your three circles. Just move them by using the Selection tool.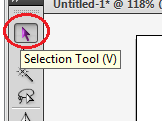
7. Combine them into 3 overlapping rings like the graphic you see below. This will be the base for our leaf in the clover.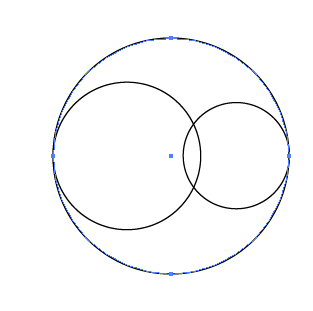
8. Next, click and hold onto the Pen tool and choose the option “Convert Anchor Point tool”.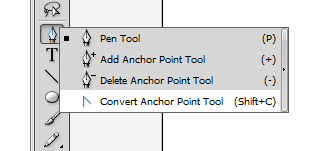
9. Select the largest circle’s bottom anchor point and click/drag it a bit down. You will see that your big circle gets a pointy end in the bottom.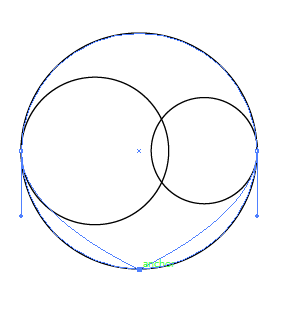
10. Extend the pointy end even further by selecting the Direct selection tool in your tools window.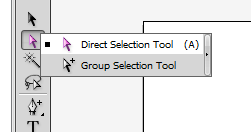
11. Click and drag the bottom anchor point a bit more downwards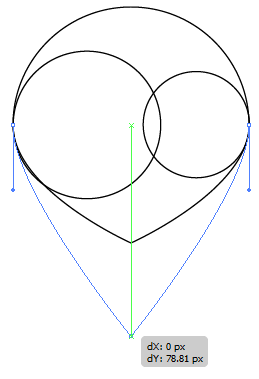
12. Afterward, select all your circles. Then, open the pathfinder window. If you do not see this window, it is in Windows -> Pathfinder. Click on “Divide” .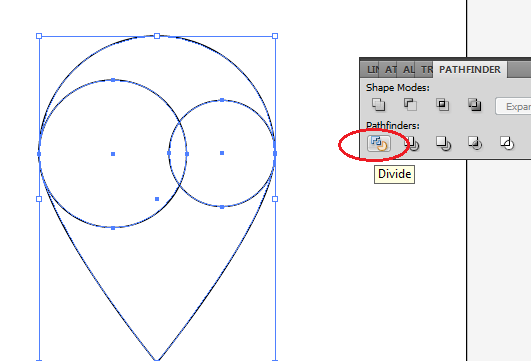
13. Afterwards, right click on your whole selection and then choose the option “Ungroup” from the context menu.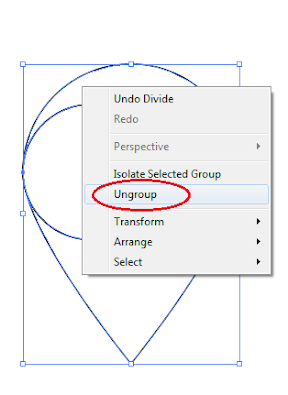
14. Next, using the DIRECT selection tool, just click on the top anchor point and press “Delete” on the keyboard.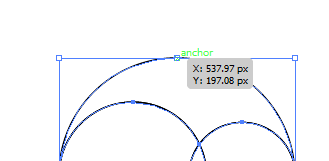
15. Afterward, go back to the Pathfinder tool and select the Unite Option to combine your shapes.
16. We will then get our first Leaf shape for the clover.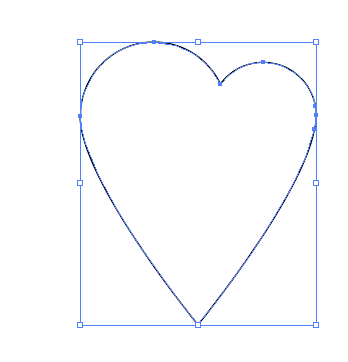
17. Add a fill colour of green to this shape to get your first leaf ready. You should also go for a darker green stroke if you like.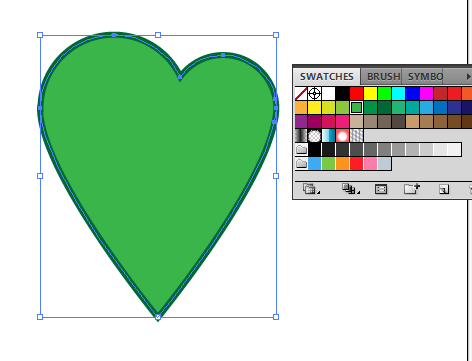
18. Then duplicate this leaf shape by pressing CTRL+C and CTRL+V. Do this two times.
19. Just, right mouse click on those new copies of the life and rotate them by choosing the option Transform -> Rotate…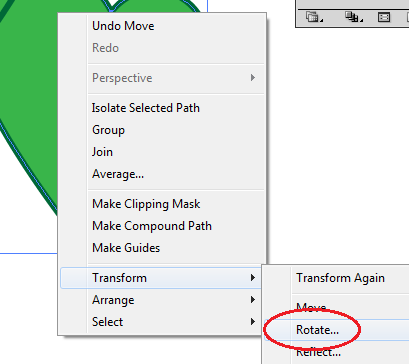
20. Set one leaf to rotate at 90 degrees, while the other must be set to -90 degrees.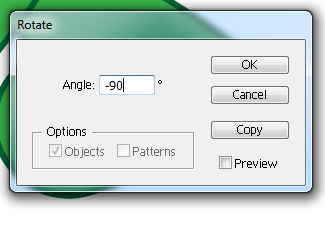
21. Then, just position your leaves accordingly to form the clover shape as you can see below.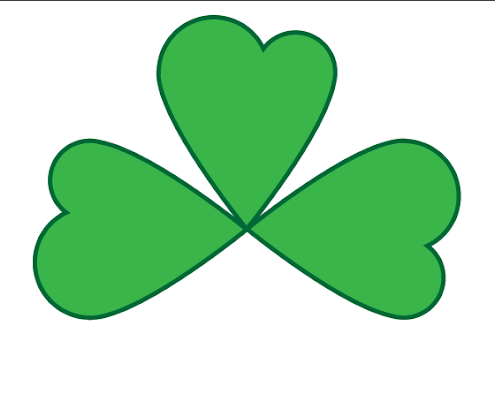
22. Finally, use the pen tool to create the stem.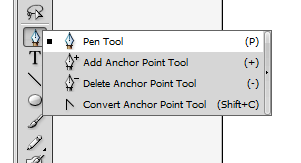
23. Just create a slight curve to make things look natural.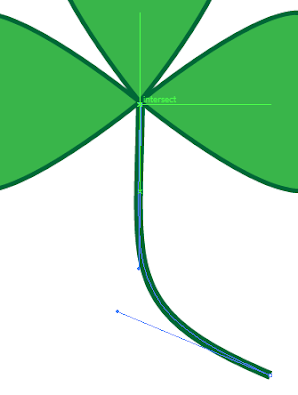
24. Great! Now you have a nice clover leaf. Just style it any way you like for your design theme.
You need to be a member of Maoliworld to add comments!
Comments